
Just like Adobe Connect, Zoom provides the feature of Breakout Rooms for student group collaboration.
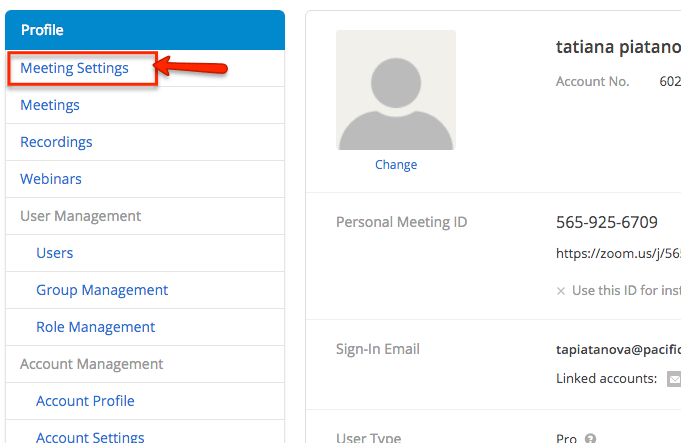
IMPORTANT: First, you have to make sure that Breakout Feature is enabled in your account. Log in to Zoom.us then go to Meeting settings in the left-hand-side menu:
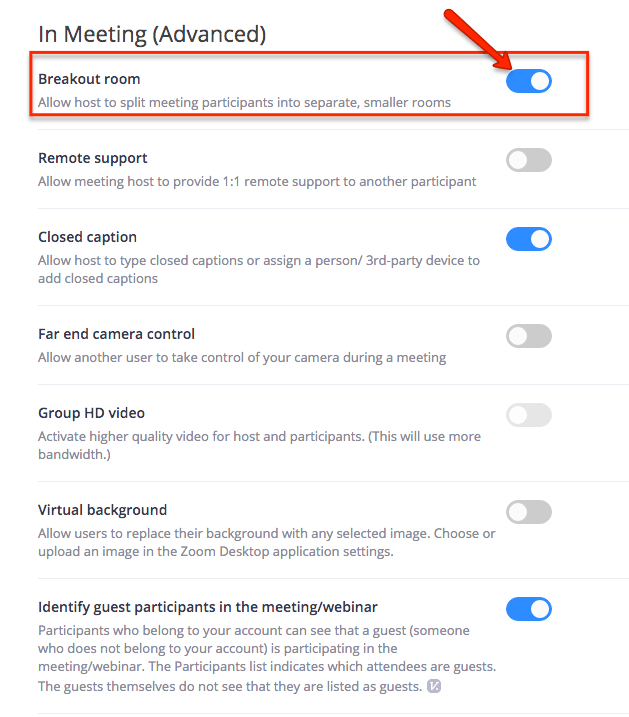
In Meeting Settings scroll down until you see “In Meeting (Advanced) section and make sure that Breakout Room is enabled.
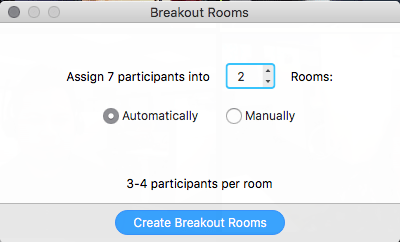
Once you enable that feature, to start breakouts click on “Breakout Rooms” in the lower right tools corner:

Zoom will open a pop-up window where you can set breakout arbitrary by the number of rooms or drop students in breakout rooms manually then click “Create Breakout Rooms”::
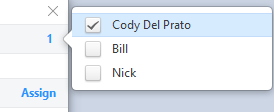
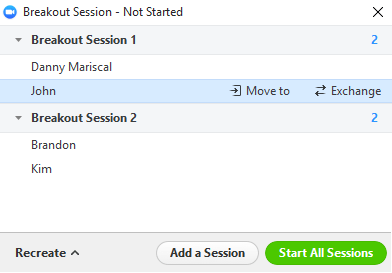
If you chose a Manual option you can assign participants to different rooms click on Assign link on the right and then select participant’s name:
Once participants are assigned to Breakout Rooms, click “Start All Sessions” button:
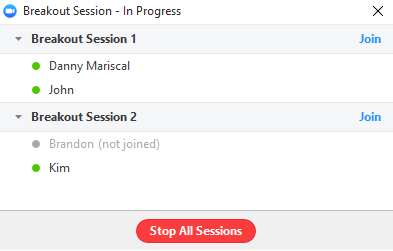
Once you click “Start All Sessions” the pop-up window will change to display all rooms with the button “Join” for you to enter any room you like. This is also where you will end breakout session:
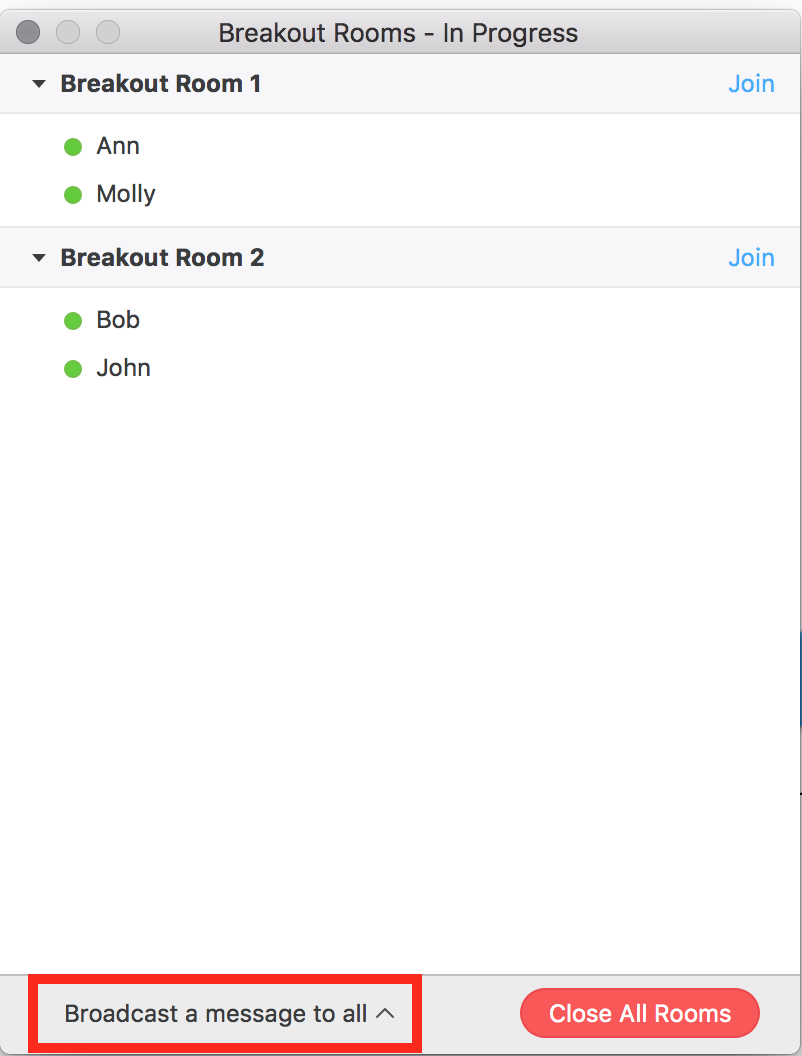
Additionally, there will be a button to Broadcast message to all which you can use, for example,” to give a warning of how much time is left for the session:
For a more comprehensive tutorial on how to use Breakout Rooms and visit tutorials at Zoom: https://support.zoom.us/hc/en-us/articles/206476313
For questions about Zoom please contact Tatiana Piatanova (tapiatanova@pacificu.edu).