Click Log In button on upper right:
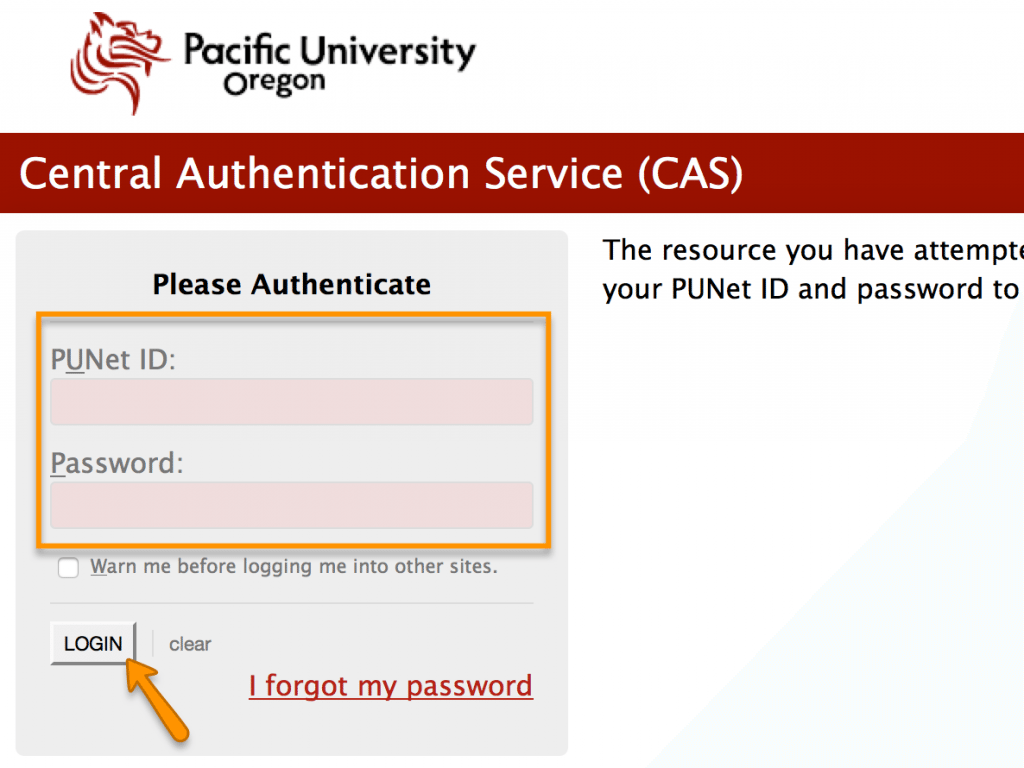
Sign in with your PUNetID credentials (just like you would if you were signing into your email):
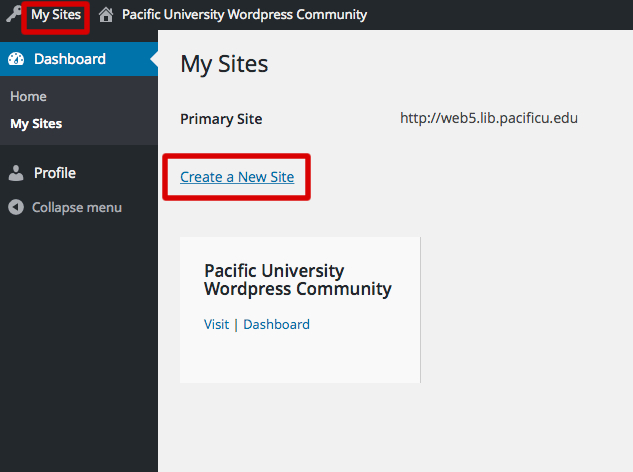
You will be added to the main Pacific WordPress Community site (web5.pacificu.edu) automatically once you sign in. After logging in you will be taken to the Dashboard of the Community site. Click on My Sites on top left and then on Create a New Site:

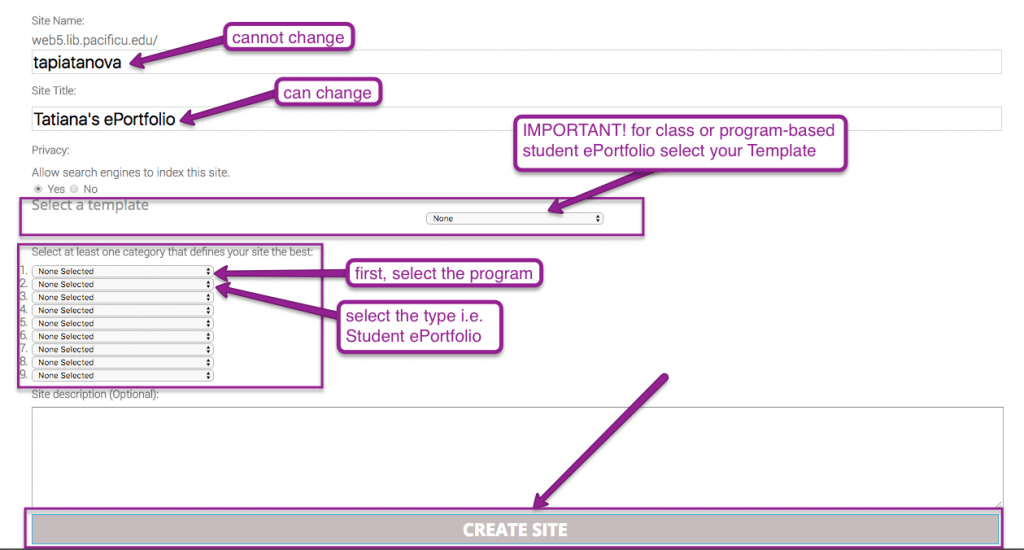
WordPress will take you to Create New Site page where you will be asked to fill in information:
- Site Name will be your site’s address, so keep it short. You can not change it later!
- Site Title you will be able to change anytime. You can title it with your first and last name or with your first and last name followed by ePortfolio.
- IMPORTANT! If you are creating a student portfolio site for a class or a program, select an appropriate template for it from Select a template pull-down menu.
- To get your site properly listed, use “Select at least one category…” to identify where your site will belong. For example, if you are a student and your site is for Compliance Certificate Program first, select that program from the list, second Student ePortfolios. This will ensure that your site can be found in Sites Directory.

Click CREATE SITE at the bottom after you are done. You should see a confirmation that your site was created and can access it and start editing by clicking on a site’s title or site’s address at the bottom:
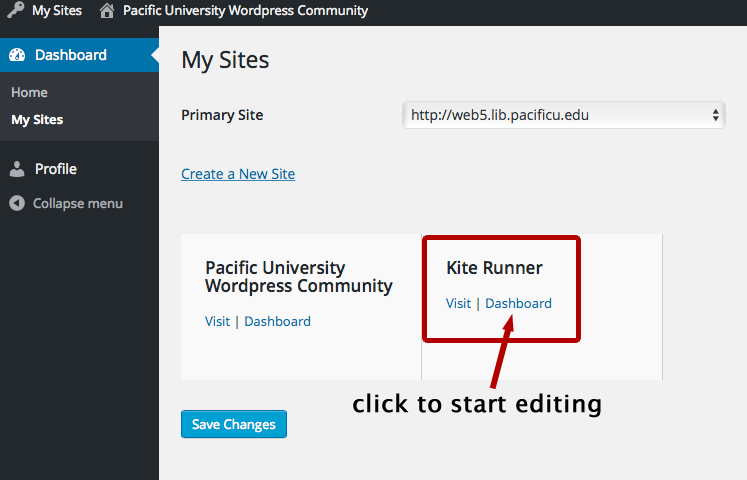
Next time you log in to web5.pacificu.edu you will see your site listed in your Dashboard. Click on the Dashboard underneath the title of your site to start editing it:


